Drop-In 30 mm to 60 mm Cage System Adapter

- Quickly Insert and Remove a 30 mm Cage Assembly within a 60 mm Cage Assembly
- Flexure Clamping Mechanism for Secure Mounting without Disassembly of Existing Cage System
Application Idea
CDA1 Mounting a 30 mm Cage Assembly within a 60 mm Cage System
CDA1

Please Wait
| Cage System Size Adapters |
|---|
| In-Line Cage Plates |
| Orthogonal Adapters |
| Drop-In 30 mm to 60 mm |
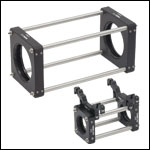
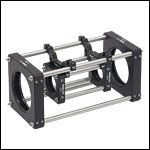
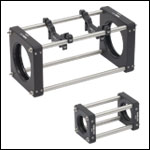
The CDA1 allows for the insertion of a subassembly built using our 30 mm Cage System components to be inserted into a 60 mm Cage System between two 60 mm cage plates, with the two cage system axes aligned to within ±0.006" (±0.15 mm). The adapter features a flexure clamping mechanism to securely attach to two of the cage rods of the 30 mm cage system and two of the cage rods of the 60 mm cage system. This adapter allows subassemblies to be removed from a cage system for diagnostic purposes, or permits multiple optical assemblies to be easily swapped in and out of the beam path. The Ø1.25" relief cut in the adapter is designed to allow SM1 lens tubes, or other Ø1.20" objects, attached within the 30 mm cage system to fit within the completed assembly, as shown in the image above.
Usage Tips
We recommend using two CDA1 adapters in a pair (as shown in the photos) to ensure collinearity of the two cage system axes. First, build both the inner 30 mm cage subassembly and the outer 60 mm cage system. Next, snap the two CDA1 adapters to the 30 mm cage assembly using the two inner flexure clamps on the CDA1, and lock the flexure with a 5/64" (2 mm) hex key; this is shown in Figure 1.1. Then, place the 30 mm cage system into the 60 mm cage system in the desired location, with the outer two flexures of each CDA1 placed onto the outer cage rods, as shown in Figure 1.2. The outer flexures can also be locked with the 5/64" (2 mm) hex key. We suggest mounting the CDA1 from the top of the cage system; for extra stability, additional CDA1 adapters can be attached to the side or bottom of the cage systems.
To remove the 30 mm cage subassembly, first loosen the inner flexures on each CDA1, then remove the 30 mm subassembly from the 60 mm cage, as shown in Figure 1.3. The CDA1 adapters can be left in place on the 60 mm system to serve as a reference point when it is time to reattach the 30 mm cage subassembly.
Thorlabs also offers a complete line of cage system adapter plates for constructing fixed assemblies using our 16 mm, 30 mm, and 60 mm cage systems. We also offer adapters for constructing orthogonal cage systems.

Click to Enlarge
Figure 1.1 We recommend building both the 30 mm and 60 mm cage assemblies separately, then attaching the CDA1 adapters to the 30 mm cage system, and then inserting that assembly into the 60 mm cage system.

Click to Enlarge
Figure 1.2 The completed assembly. All four flexure clamps can be locked and unlocked using a 5/64" (2 mm) hex key.

Click to Enlarge
Figure 1.3 To remove the subassembly, we recommend loosening the flexures for the 30 mm subassembly, and then removing the subassembly from the bottom or side of the 60 mm cage structure.
| Posted Comments: | |
| No Comments Posted |
 Products Home


 60 mm to 30 mm Drop-In Cage Adapter